Fire Safety Tips for the Holiday Season

The holiday season is a time of celebration, family, food, and tradition. We love to enjoy meals together, Christmas tree decorating, and warming up by the fire. With the wonderful scent of Christmas candles filling the room, it begins to feel cheerful and exciting. We have no worries other than what we will cook for our Christmas meals and what gifts we will put under the tree.

There is one more item you should add to the top of your holiday favorite activities, and that is "Christmas safety". With all our baking and decorations, electrical hazards and open flames can cause safety issues in your home. As you prepare to light candles and play holiday music, remember to follow fire safety tips. This will help keep you and your loved ones safe this holiday season.

Holiday Safety Tips

Property Restoration Services by Jenkins Restorations | Icons png

Every year, hundreds of fires are reported due to Christmas trees, candles, and improper fireplace usage. Most fires are preventable if only a few precautions are taken to ensure proper safety measures are in place. So, as you bring out the candles, lights, and wood, follow these electrical safety tips and enjoy a safer holiday season.

  1. Use caution when putting up light decorations on your Christmas tree and around your home. Use proper work practices when installing lights and follow these light safety tips.
    • Check whether your Christmas lights are intended for indoor or outdoor use. Keep cords dry and away from any moist surfaces. The improper use of indoor or outdoor lights can increase your risk of a fire incident.
    • Don't overburden your extension cords. Keep them uncovered and unplug them when they are not in use. Be sure to leave enough slack in the cord and keep extension cords away from children and pets.
    • Use a wooden ladder instead of a metal ladder when stringing lights to prevent accidental electrical shock.
    • Only plug outdoor Christmas lights into electric circuits protected by Ground Fault Circuit Interrupters (GFCIs).
    • Avoid using Christmas lights with worn, cracked or frayed cords.
    • Stringing too many lights together can increase your risk of an electrical shock or fire. Likewise, do not overload your outlets when plugging in lights and other electrical decorations.
  2. Keep flammable items away from cooktops, ovens, and candles.
    • Towels, curtains, holiday decorations, and other flammable materials should remain at least 3 feet away from any hot or flammable source.
    • Be sure to test your smoke alarms to ensure they are working properly.
    • Have properly rated fire extinguishers on hand in case of an emergency. Check out our blog to learn more about the different types of fires and how to extinguish them.
  3. Use candleholders to properly secure candles before lighting the flame.
    • Keep candles out of reach of children.
    • Candle-holding devices can help secure candles to prevent accidents such as hot wax spills.
  4. Never leave lights or candles on overnight. These can be a fire hazard if left on or unattended. This includes unplugging lights on your Christmas tree or other decorations around the house.
  5. Check your fireplace to ensure it is clean before use.
    • Using a fire screen will help protect you and your loved ones from the flames and ensure embers stay contained.
    • Be sure that all flames are extinguished once you’re finished using the fireplace.

Avoiding Holiday Kitchen Fires

The holidays become your chance to try out every recipe you've been pinning to your Pinterest board throughout the year. From the most experienced to the newest bakers and chefs, it seems everyone wants to try their hand in the kitchen. But those tasty new recipes may bring more than a delicious new appetizer to your holiday party. Here are a few tips to keep your kitchen fire-free.

Stay safe and enjoy your holiday baking adventures this season.

Preventing Christmas Tree Fires

Whether you like a real tree or an artificial one, there are safety tips for all Christmas trees. Follow these tips to stay safe this holiday season.

Artificial Christmas Trees

Artificial trees are often made to be fire-resistant. When shopping for your tree, check to see if the label indicates it is fire-resistant. This might not prevent a fire outbreak, but it does reduce the risk and helps any fires to be extinguished more effortlessly.

If you’re hoping for a pre-lit artificial Christmas tree, make sure the tree has a seal from an approved safety testing laboratory. Replace any bulbs that are burnt out before plugging in your tree.

Even though many artificial trees can be fire resistant, you should still make sure your tree is set up away from any heat sources.

Real Christmas Trees

Nothing beats the smell of a real Christmas tree. To ensure your tree stays fresh and lasts all season, be sure to pick a tree with fresh green needles that do not easily come off when you touch them. Stay away from dry trees as they are at a higher risk of catching fire.

Be sure to check the water level of your stand daily and ensure there is always water left. This will help prevent your tree from drying out too quickly.

Just like artificial trees, real trees should not be placed near any heat sources as this will greatly increase the risk of a fire.

How Do Christmas Trees Catch Fire?

Christmas trees can catch fire for many reasons. One reason is electrical issues from decorations. Heat sources that are too close to the tree can also cause fires.

If you purchased your real Christmas tree early in the season, you could be at an increased risk of your tree catching on fire. After your tree has been cut, it begins to dry out. The longer your tree has been cut, the dryer it becomes, and your Christmas tree could show signs of dryness before the holiday season is over. Dry Christmas trees are more susceptible to heat sources or Christmas lights that could also cause electrical fires.

A fire can easily be avoided when proper precautions are taken. So, be safe, and enjoy a wonderful holiday season with friends and family. 

How to Clean Smoke Damage

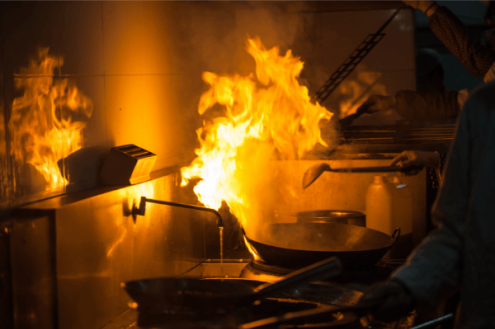
Fire damage causes burning or melting of objects and materials due to heat, while smoke damage refers to physical damage resulting from smoke, rather than damage from the heat of the fire.

Few events can be more devastating and traumatic than a house fire and the smoke damage that comes with it. It can be disastrous to your home, destroying possessions and memories along with it. Apart from the loss of furniture and personal items, you’ll likely have to make other repairs such as patching holes and window replacements.

Possessions can be replaced, and a home can be rebuilt, but not always so easily. It’s important to know how to clean smoke damage, and you may even find yourself grappling with lingering water damage once the fire is extinguished.

Restoration and repair may seem daunting at first, but with the support of your community, and the right partners, you can restore your home back to its original beauty.

If you need smoke damage restoration right now, then click here.

Smoke Damage Restoration

Initial Fire Damage Cleanup

Smoke damage

It might be startling to see the immediate aftermath of a fire in your home. Apart from the soot and smoke damage, there’ll likely be damaged and destroyed furniture, books, articles of clothing, and other prized possessions.

Once you get over the initial shock, the first step of the smoke damage restoration process is similar to decluttering your home— you’ll want to go through your belongings and keep the items that are salvageable, while throwing away those destroyed or damaged beyond repair.

This step will likely be the most emotional. It really does drive home how much damage the fire caused. Clean the smoke and clear the space at your own pace, it does not need to be rushed.

Once you’ve cleared out your debris, you can start surveying the area to determine your next steps for smoke damage cleanup.

Look for Any Additional Smoke Damage in House

First, you need to go through every room in your house to figure out if any other rooms or areas were affected.

While it’s usually fairly easy to tell where you need to clean smoke damage in the room that the fire was contained to, smoke has a tendency to drift from room to room. It could cause damage in areas that were not even close to the fire.

Inspecting your ceilings is an important part of this task. When surveying smoke damage, it’s fairly common to focus on the walls, as the damage is the most noticeable there. However, it’s important to check your ceilings too, which often will have extensive damage and will require just as much attention as your walls.

What Does Smoke Damage Look Like?

Before cleaning smoke damage, you’ll have to know how to identify which parts of your home have been effected by it. Smoke damage can be found in areas well away from where the fire happened, making even a small fire a danger for large amounts of smoke damage. Ways to know how to determine smoke damage include:

Can Smoke Damage Be Removed?

Many people might assume smoke damage is permanent, when most of the time it can be removed. How to clean smoke damage depends on the extent of the soot and whether the surfaces are porous or nonporous. How well you take care of these items will determine how long it takes for your smoke damaged walls, floors, clothes, etc., to be renovated back into their original state.

What To Use to Clean Smoke Damage?

Now that you’ve determined where the damage is, it’s time to get started with cleaning smoke damage. The first step in cleaning smoke damage is to open up as many windows as you can throughout the house. Ventilation can help limit the damage and speed up the cleaning process, so turn on any fans, and get the air blowing.

If you’re wondering what to use to clean smoke damage, know that it’s important to have all of the tools available to you, even the specialized ones. To remove smoke and soot damage from walls, furniture, and other parts of your home, make sure you have all of these smoke damage cleaning products:

You may not have a smoke vacuum or other specialized tools used for smoke remediation, but that’s okay. A standard vacuum can work wonders in clearing up soot that gathered during the fire.

Smoke Damage Cleanup

Vacuum All Soot and Ash Off Ground

Now you should begin the first step in your smoke damage restoration, which involves removing any and all soot and smoke particles that are on the floor of the affected areas. Soot can be quite dangerous to your lungs, and affect breathing or even cause some types of cancer, so you’ll want to remove it as soon as possible and make sure you’re wearing Personal Protective Equipment (PPE).

While wearing gloves, a mask, and goggles, start off by vacuuming up the loose soot in or around the affected area. Ideally, you’ll use a smoke vacuum, or at least a powerful dry-vac for this task. However, a standard vacuum with an upholstery attachment can do the job as well.

Be gentle as you vacuum up the soot and debris, since just running a vacuum cleaner over the smoke damaged areas is more likely to spread the soot and drive it further into the floorboards and walls.

Once you’ve removed as much soot and ash as you can from the ground, it’s time to focus on the walls.

How to Clean Soot Stains from Walls

The next step is to inspect the walls for any soot particles. This is different from cleaning the walls of smoke damage, which will happen later. First, all of the larger pieces of soot, both on the floor and on the walls, must be carefully vacuumed before you can move on to the important next step.

Otherwise, in trying to clean smoke damage, you could inadvertently make it worse by spreading unvacuumed soot into your walls. If this happens, make sure you call a restoration company with a professional soot removal team.

How to Get Rid of Smoke Damage Once Soot Is Removed

The cleaning process for soot residue and stains and smoke damage takes place in three phases.

First, you will be removing the bulk of the smoke with a dry-cleaning or soot cleaning sponge. These are meant specifically for smoke restoration projects.

Have several on hand, and use one gently on a dry surface. You don’t want to use any water or cleaners at this point, simply take the sponge and softly rub it at affected areas, careful to not use the same part of the sponge for more than a few strokes.

Use the sponge until it has no areas that aren’t blackened—at that point, cut off the surface area with a knife and start again, or just use a new sponge, until you’ve covered the whole area.

After that, you’ll want to go in with your cleaning solution in warm water, using rags to wipe the wall. A commercial soot cleaner would be great here, but paint thinner or even vinegar in warm water can also do the job.

Once you’ve cleaned the area you’ll have one final step, using your second bucket filled with warm water. This time around, you’ll be using a degreaser or mild dish soap with hot water, so you can finally scrub off the more oil-soluble smoke and soot particles.

Once you’ve thoroughly cleaned the area with all three of these products, you should rinse the walls down with hot water, to fully clear the area of the cleaning products you’ve used.

How to Clean Fire Smoke off Walls

When cleaning smoke off walls, you must make sure to follow the three steps laid out in the previous section. Start with blotting every area and getting rid of as much smoke as possible with the dry-cleaning sponge.

As you clean your smoke damaged walls, it’s important to focus on small areas at a time, going from the floor up towards the ceiling, to avoid streaks and stains. As always, make sure to rinse the area thoroughly once you’ve finished. If you have wallpaper, you’ll want to dry the walls as soon as you’re finished, to avoid water soaking through and damaging them.

How to Clean Smoke Damage from Painted Walls

With painted walls, it may not be a bad idea to repaint after removing the soot damage. If a painted wall has been stained by cigarette smoke, it can be cleaned using a solution of half water and half vinegar. The vinegar will smell at first, but should disappear within a days time, while removing the stain and not damaging the paint!

How to Clean Smoke Off Windows

For the windows, it’s significantly less complicated. First, clean the windows with the cloths and soot cleaner, then use the degreaser to remove anything that’s left.

If you’re using a spray bottle, just fill it up with water and add some white vinegar. Spray on the glass and let sit for about 5 minutes, then wipe off with a rag or paper towel. If it’s cigarette smoke on your window, the white vinegar in the solution will dislodge the nicotine so that it is easy to remove the nicotine from your window.

How to Clean Smoke Stained Glass

Similar to windows, to clean smoke stained glass tables, windows, or any other appliance, the first step is to clean the windows with cloths and soot cleaner. Remove all of the particles from the surface of the glass. Mix water and a little bit of white vinegar and spray it on the glass. Let it sit for a few minutes before using a towel or rage to wipe off.

How to Clean Smoke Damage from Ceiling

Finally, you’ll want to clean any smoke damaged ceilings. Again, you’re following the same steps as the previous sections. Expect the ceiling to be harder to clean.

You’ll want to bring in a ladder, so you can access these hard to reach damaged areas. Once you’ve taken care of that, you’ll want to work in small, manageable sections, with all three of your cleaners.

How Do You Clean Smoke Damage off of Floors?

For hard flooring that has been stained from fire and smoke damage, a gentle dish soap with warm water can be used.  Gently scrub the floor to remove the residue.  Dry quickly and carefully to avoid any water damage.

Carpets can be vacuumed to remove loose soot and shampooed to give a deeper clean.  You can call a professional team of specialists to do this, as they have the skills and the proper equipment to get the job done well.  But if you prefer a DIY approach, invest in a quality carpet shampooer and cleanser which you can easily find at your local home improvement store.

How to Clean Smoke Damaged Furniture

If you want to clean smoke damaged furniture, sprinkle upholstery with baking soda, let sit for 24 hours, vacuum, and then repeat. Remove all removable covers, and wash in cold water. Hang your removable covers outside when possible to speed drying and eliminate odors. Lastly, lightly spray the cleaned fabric with a product formulated to deodorize smoke-damaged fibers

How to Clean Wood Furniture with Smoke Damage

To clean smoke-damaged wood furniture:

  1. Use your vacuum’s flat brush to remove soot from the wood.
  2. Use a dry chemical sponge to wipe away any soot. To avoid scratching, wipe along the grain.
  3. Wipe down the wood with a damp cloth and then let it dry.
  4. Lastly, use a high-quality wood polish or conditioner and use it to restore the finish!

How to Clean Smoke Damaged Items

Sometimes, fires can be smaller in scale causing only partial structural damage to your home and its contents.  Yet there may still be significant smoke/soot damage on any personal possessions inside. When it comes to cleaning smoke damaged items, be sure to follow these steps listed below:

Safety

The safety of everyone involved in a fire damage cleaning situation is crucial. Specialists in fire damage restoration can take necessary precautions to ensure the safety of all workers and anybody entering a structure after a fire. Prior to the evaluation and restoration, it is critical that the structure is safe.

Inspection

When evaluating your personal items, it’s important to inspect what is and is not salvageable.  The items that are no longer of use can be safely discarded.  Items that are significantly damaged, melted, broken or exposed to the elements, should be thrown away safely. On the other hand,  items that are still intact (such as clothing, bedding and linens) can be sorted and taken to a laundromat.  Furniture and other usable items can be cleaned by a contents and structural cleaning team.

Keeping Track

With your salvaged items, you may want to take into account all the items you saved, and where they will be stored and where they will be sent to get cleaned.  You can also create an inventory of the essential items that you had to discard, as it is imperative to receive adequate compensation once you’ve begun filing an insurance claim.

Cleaning Process

For the items you can still use, you must begin by carefully cleaning smoke damage from your personal items. Trisodium Phosphate (or TSP) is an effective, heavy-duty cleanser for problem areas around the house that may be sooty, greasy, or dirty.  For every tablespoon of TSP use a gallon of warm water.

Use rubber gloves, goggles and rags to safely get the job done. With walls and ceilings, be sure to avoid oversaturation and give surfaces plenty of time to dry before you continue to clean.

How to Clean Smoke Damaged Clothes

Soot and smoke damage on your clothing isn’t just an eyesore but also a health hazard that needs to be taken care of as soon as possible.

Use a good, strong laundry detergent and wash on as hot a water temperature as the fabric will allow. Once set on the rinse cycle, use a quality fabric freshener

Once you’ve finished washing your clothes after they’ve been damaged in a house fire, don’t dry them in a dryer. Instead, hang them to dry naturally.

If smells still linger, you can contact your local dry cleaners for further assistance.

How to Get Smoke Smell out of Books

If you want to remove smoke smell from books, simply pour half a cup of baking soda into a large bag and add the smoke-damaged books in with it, and tie the bag shut. Leave it in there for about 8 hours before removing the books and dusting them off.

Another, simpler way that has shown some success in removing the smoke smell out of books is by ventilating it. This may take more time to see any progress. To do this, open the book and set it on its tail edge, then spread the pages to allow air circulation. This works indoors or outdoors (weather permitting).

What to Throw Away after Smoke Damage

After smoke damage, certain items like perishable food that has been sitting at room temperature for too long should be thrown away. If any food items have been directly exposed to smoke, they need to be thrown away.

Check your medicine cabinet to see if anything has been damaged by smoke. If you notice anything is warped from exposure, throw it out immediately.

If you have any other questions about whether an item should be thrown away after smoke damage, it’s best to ask a smoke damage restoration team, like Jenkins Restorations.

Removing the Smoke Odor

Even once you remove the smoke and soot damage, you may still need to remove the smell of smoke. In order to remove any smoky scents from your salvages items, here are a few ideas that can help:

Ozone Treatment for Smoke Damage

If you still are experiencing smoke odor, ask a professional fire restorer about an ozone generator. Ozone generators make ozone gas that is compatible with pollutants and alters their chemical composition. This is a popular method because the machine can be turned on and left unattended, while the ozone spreads throughout the area and breaks down the smoke molecules. This process works fast and can be done typically within a day.

Thermal Fogging Odor Removal

One way to eliminate the smoke odors from your home is through thermal fogging. It involves heating a deodorizer and spraying it in fog form. In addition to neutralizing the unpleasant odor, thermal fogging reduces health issues related to cancer-causing debris.

If the Damage Is Too Severe, Call a Professional

Once you’ve followed these steps, hopefully your home has begun to look like it did before the fire. Unfortunately, most smoke damage cases are too severe for these methods alone to be enough.

If smoke damage and soot still persists, or if you have other damage to your home from a fire, call a professional fire restorer such as Jenkins Restorations, to make your home feel like new once again. Our team includes soot removal services, water removal after the fire is put out, and deodorizing in our fire damage restoration process.

Frequently Asked Questions

Yes, you can paint over smoke damage. However, you should make sure all soot is cleaned off the wall before you begin. The best way to do this is to use a primer first, then apply two coats of paint.

Dry cleaning removes all types of stains, including those caused by smoke. However, it cannot remove smells from clothing that has been damaged by fire. If you want to remove the smell of smoke, you should wash your clothes in hot water.

Smoke damage can negatively impact porous surfaces, like carpets, curtains, furniture, or even clothing within your home. The particles and odor are likely to get caught in soft areas, like your carpet, requiring professional cleaning. Walls and floors can sustain visible or invisible damage, such as a black wall or a lingering smell.

Holiday Ready: Your Ultimate Pre-Holiday Safety Tips

The holiday season brings the delightful smell of delicious foods, the sparkle of twinkling lights, and the joyful sound of festive carols. Yet, with that brings cold weather, fire hazards, and additional safety concerns!

With the stakes high and the celebrations going strong, it’s important to be prepared. In this article, we provide you with holiday safety tips to ensure you are prepared for the holiday season.

How to Prepare Your Home for Cold Weather

Holidays mean vibrant decorations and memorable gatherings, but often overlooked is the importance of general safety. During the holidays, many home-related accidents tend to occur. Thus, it’s not just about setting the scene but also ensuring it’s safe.

To ensure a safe and enjoyable holiday season, it’s important to keep a few things in mind. First, make sure to securely fasten all decorations to prevent them from causing any accidents. Additionally, if you have a real tree, ensure that it is fresh and not dry, as a dry tree can become a fire hazard. Finally, use our holiday prep checklist to get ready for the cold weather and holiday season.

Holiday Cooking Safety Tips

The irresistible scent of holiday meals can bring joy and warmth to any home. However, with the kitchen being a high-traffic area during holiday gatherings, it’s crucial to prioritize safety.

holiday cooking safety
  1. Never Leave Cooking Unattended: It’s easy to get distracted by the festivities and having loved ones around but remember, unattended cooking is a leading cause of kitchen fires. Always stay in the kitchen when you have something on the stove and use a timer for dishes in the oven.
  2. Keep a Clutter-Free Kitchen: Clear your cooking area of any flammable items such as dish towels, paper products, or oven mitts. This will help prevent any accidental fires.
  3. Have a Fire Extinguisher Handy: A fire can escalate quickly. Having a fire extinguisher in an easily accessible location can help control a situation before it gets out of hand.
  4. Avoid Loose Clothing: Loose sleeves or clothing can easily catch fire from a stove burner. Wear tight-fitting clothes or roll up your sleeves while cooking.
  5. Be Cautious with Hot Oil: If you’re deep frying or sautéing, be cautious. Hot oil can splatter and cause burns. Also, never put water on an oil fire; it can cause the fire to spread.
  6. Practice Safe Food Handling: Ensure all food is cooked to the correct temperature to prevent foodborne illnesses. Use a food thermometer for accuracy.

Christmas Light Safety: Brightening Your Home Safely

Decorating your home with Christmas lights can truly bring the holiday spirit to life. However, it is essential to keep safety in mind while doing so. Here are some tips to ensure you safely brighten up your home:

  1. Check Your Lights: Before you start hanging lights, inspect them thoroughly for any broken or cracked sockets, frayed wires, or loose connections. Discard damaged lights; they are a potential fire hazard.
  2. Outdoor Lights: Make sure your lights are certified safe for outdoor use. Look for the UL (Underwriters Laboratories) safety certification on the packaging.
  3. Use Clips, Not Nails: When hanging lights, avoid nails, staples, or screws that can damage the wiring. Instead, use insulated holders or plastic clips.
  4. Don’t Overload: Avoid plugging in too many strands of lights into a single outlet or extension cord. This can overload the circuit and cause a fire hazard.
  5. Turn Off Lights: If you’re not using a timer, turn off the lights before going to bed or leaving the house. Unattended lights can overheat and cause a fire.
  6. LED Lights: Consider switching to LED lights. They use less energy and don’t generate as much heat as traditional incandescent bulbs, making them safer.

If you are looking for more information on holiday fire safety, click here to learn more.

Avoiding Winter Roof Damage

winter roof damage

Winter weather can wreak havoc on your roof during the holiday season, the most exposed part of your house. Snow and ice, specifically, can cause severe damage if not appropriately managed. As a preventative measure, it’s essential to ensure that your roof is in good condition before the winter season starts.

Regular inspections can help identify potential weak spots like missing or damaged shingles. Consider professional assistance if needed, as they can thoroughly check for internal damage that might not be visible to an untrained eye.

Remember to remove excess snow. A roof rake with a long handle can be used to eliminate snow build-up. However, be careful not to damage the roof’s surface. If the snow is too hard to remove, consider hiring a professional snow removal service.

Keep your gutters and downspouts clean. They play a vital role in diverting water away from your house. If they are blocked, water can back up, freeze, and cause damage. Ensure they are free of leaves and other debris, especially during the fall.

By following these steps, you can help prevent winter roof damage, protect your home, and ensure a cozy and worry-free holiday season.

Preparing for Cold Weather Damages: Ice Dams, Power Outages, and Hailstorms

Cold weather, especially a polar vortex, can bring about various challenges, making it crucial to prepare for potential damages like ice dams, power outages, and hailstorms.

Combatting Ice Dams

During the winter, keep an eye out for ice dams. These are ridges of ice that form at the edge of your roof and prevent melting snow from draining off. The water can then leak into your house, causing significant water damage.

To prevent ice dams, ensure that your attic is well insulated. This will prevent heat from inside your home from escaping to the roof and melting the snow.

Besides ensuring your attic is well insulated, consider installing heated cables along the eaves of your roof. This can help melt snow before it can form into an ice dam. Regularly clear your roof of snow to prevent build-up.

Preventing Frozen Pipes

During winter, the frigid temperatures can lead to the unfortunate freezing of water in your pipes. This can result in blockages that, if left unattended, may burst, and cause substantial water damage.

To prevent frozen pipes, measures like insulating your pipes, ensuring warm air circulates within your home, maintaining a comfortable indoor temperature, and allowing your faucets to drip are all effective ways to ward off the occurrence of frozen pipes. By implementing these precautions, you can protect your plumbing system and avoid the potential headaches of dealing with costly repairs.

Preparing for Power Outages

Power outages are common during extreme cold weather conditions and can leave you without heat when you need it most. Have flashlights, batteries, and candles readily available in case of power failures. Consider investing in a generator to provide temporary power to essential appliances. If you think there’s a chance of an outage, keep your mobile devices charged, so you have a lifeline during power outages.

Protecting Against Hailstorms

Hailstorms can cause extensive damage to your home and vehicles. To protect your roof, consider impact-resistant roofing materials. Keep your vehicles in a garage or under a carport whenever possible. If a hailstorm is imminent, cover windows and other vulnerable areas to prevent glass damage.

Fire Safety During Holiday and Winter Seasons

The holiday and winter seasons bring about a unique set of fire safety concerns that everyone should be aware of to ensure a safe and joyous time. As we move indoors to stay warm, the use of fireplaces, candles, and space heaters increases, requiring extra precautions.

Fireplace Safety

fireplace safety

Fireplaces provide both warmth and a cozy feel during the winter and around the holidays. However, they must be used with care.

Always keep a metal or heat-tempered glass screen in front of the fireplace to prevent sparks or embers from jumping out. Burn only dry, well-seasoned wood to avoid excessive smoke and creosote buildup. Never leave a fire unattended, and make sure it’s completely extinguished before going to bed or leaving the house.

To maintain the safety of your home, it’s important to have your chimney inspected and cleaned by a professional on an annual basis. This regular maintenance will help identify and prevent any blockages or creosote buildup, which can potentially lead to a chimney fire.

Space Heater Safety

Space heaters are a common means of supplementing heat during the cold months. Remember, these devices should be used for temporary heating and not left unattended or used while sleeping. Always keep a three-foot clearance from anything that can burn, including furniture, curtains, and rugs. Make sure to plug your space heater directly into an outlet and not an extension cord, as this can lead to overheating.

Candle Safety

Candles contribute to the holiday atmosphere and are especially common during the winter months. However, they pose a fire hazard if not used responsibly. Never leave burning candles unattended or sleep in a room with a lit candle. Keep candles out of reach of kids and pets, and away from flammable items like curtains, furniture, and holiday decorations.

Other options include using flameless candles, which can look and smell like real candles but are much safer.

Remember, having functioning smoke alarms drastically increases your chances of surviving a fire. Test your smoke alarms monthly and replace batteries as needed.

Damage Restoration Services

The holidays are a season of joy, but that joy is best enjoyed with safety in mind. By following these pre-holiday safety tips, you not only guarantee a wonderful celebration but also peace of mind.

If you do have water, storm, or fire damage during the winter or holiday season, make sure to contact the professionals at Jenkins Restorations to restore your property and restore your life.

How to Put Out a Grease Fire: A Guide for Homeowners

Kitchen fires associated with grease ignite over half (53%) of all home cooking fires that started from cooking materials. This includes over 60% of all deaths and 78% of property damage! Taking careful precautions becomes even more imperative when working with ingredients such as oil. If oil gets too hot and isn’t watched carefully, it can lead to a dangerous grease fire in your kitchen.

In the unfortunate event that your oil does ignite, being well-prepared will enable you to extinguish the fire promptly and safely. That’s why we are here to offer our assistance. In this blog post, we will explore what a grease fire is and how to confidently handle this potentially dangerous house fire situation.

What is a Grease Fire?

A grease fire occurs when oil or grease reaches its ignition point and catches fire. Unlike other types of fires, these fires are fueled by flammable liquids and require specialized handling. They tend to spread rapidly and can cause severe burns, property damage, and even injuries or fatalities. Grease fires have distinct characteristics, such as intense flames, thick smoke, the smell of something acrid, and a distinctive sizzling or popping sound.

What Causes a Grease Fire

Preventing grease fires starts with understanding their causes. The following factors commonly contribute to the ignition of grease fires in kitchens:

  1. High cooking temperatures: When oil or grease is heated beyond its smoke point, it becomes increasingly dangerous and can easily ignite.
  2. Oil or grease spills: Accidental spills near heat sources, on stovetops, or inside ovens can lead to a dangerous chain reaction.
  3. Ignition sources near cooking areas: Proximity to open flames, pilot lights, or hot surfaces can provide the necessary spark to ignite the grease.

Preventive Measures

Minimizing the risk of grease fires requires adopting proactive measures in the kitchen. Here are some essential preventive steps every homeowner should take:

  1. Proper stove and cooking equipment maintenance: Regularly clean stovetops, ovens, and exhaust hoods to remove grease buildup. Ensure that all equipment is in good working condition and free from leaks or malfunctions.
  2. Safe cooking practices: Avoid overheating oil or grease and always stay attentive while cooking. Keep flammable items, such as towels or oven mitts, away from heat sources. Never leave cooking unattended.
  3. Placement of fire extinguishers: Install a class K fire extinguisher. Not all fires are alike, meaning it’s important to use an extinguisher that pertains to grease fires specifically. Keep it in close proximity to the cooking area. Ensure that everyone in the household knows how to use it correctly.

How to Put Out a Grease Fire

What causes a grease fire

Knowing how to respond promptly and effectively when faced with a grease fire is vital. Follow these guidelines to stop a one safely:

Assess the situation: Quickly evaluate the size and severity of the fire. If it is a small fire contained within a pan, you may be able to handle it safely. However, if the fire has spread or is out of control, evacuate immediately and call emergency services.

Response guidelines for different fire sizes:

Small grease fire: Carefully place a metal lid or cookie sheet over the pan to smother the flames. Turn off the heat source.

Medium-sized grease fire: Use a fire extinguisher specifically designed for grease fires. Remember the P.A.S.S. method—Pull the pin, Aim at the base of the fire, Squeeze the handle, and Sweep from side to side.

Large grease fire: Evacuate the premises and call emergency services. Do not attempt to extinguish a large grease fire on your own.

What if the Grease Fire is in an Oven?

Dealing with a grease fire in an oven requires a slightly different approach, as the enclosed space presents additional challenges. If a grease fire erupts in your oven, it’s essential to stay calm and follow these steps:

  1. Keep the oven door closed: As soon as you notice the fire, resist the temptation to open the oven door. Opening it will only provide oxygen to the flames, worsening the situation. By keeping the door closed, you can help contain the fire within the oven cavity.
  2. Turn off the oven: Locate the oven controls and immediately switch them off. Cutting off the heat supply will help prevent the fire from spreading further.
  3. Do not use water: Under no circumstances should you attempt to extinguish a grease fire in the oven with water. Water will only cause the hot grease to splatter and spread the fire, leading to a more hazardous situation.
  4. Let the fire burn out: In most cases, it is best to allow the fire to burn out on its own. The lack of oxygen inside the closed oven will eventually cause the flames to subside. However, it is crucial to closely monitor the situation to ensure the fire does not spread outside the oven.
  5. Call emergency services: If the fire continues to grow or poses a threat. Evacuate your home immediately and contact the fire department. It is always better to prioritize your safety and let professionals handle the situation.

Using the P.A.S.S. Method for Fire Extinguishers

When using a fire extinguisher to combat a grease fire, it is crucial to employ the P.A.S.S. method correctly:

  1. Pull the pin: Remove the safety pin located on the extinguisher’s handle.
  2. Aim at the base of the fire: Direct the nozzle or hose at the base of the flames, not the top.
  3. Squeeze the handle: Firmly grip the handle and squeeze it to release the extinguishing agent.
  4. Sweep from side to side: Move the extinguisher from side to side, covering the base of the fire with the extinguishing agent.

Alternative Methods to Extinguish a Grease Fire

In situations where a fire extinguisher is not readily available, you can utilize alternative methods to suppress a small grease fire:

  1. Baking soda: Sprinkle a generous amount of baking soda onto the flames to smother the fire.
  2. Salt: Similarly, you can use salt to cover the fire and stifle the flames.
  3. Covering with a metal lid or cookie sheet: Carefully place a metal lid or cookie sheet over the pan to cut off the fire’s oxygen supply.

What NOT to Do When Faced with a Grease Fire

During a grease fire emergency, it is essential to avoid certain actions that could worsen the situation:

  1. Never use water: Water and grease fires do not mix. Water can cause the fire to spread rapidly and potentially lead to explosions.
  2. Avoid using flour or sugar: These substances are highly flammable and can intensify the fire.
  3. Do not attempt to carry the burning pan outside: Moving the pan can cause the fire to spread or result in personal injury.
  4. Do not fan the flames: Fanning the fire can feed it with oxygen, making it grow stronger.

Fire Restoration after a Grease Fire

After successfully extinguishing a grease fire, it is essential to assess the potential damage caused by the incident. Even small fires can leave behind significant consequences, including smokesoot, and water damage. In such cases, seeking professional restoration services becomes crucial.

  1. Assessing the damage: A professional fire damage restoration company has the expertise to assess the extent of the damage accurately. They can identify areas affected by fire, smoke, and water, even those that may not be immediately visible.
  2. Mitigating secondary damage: Timely intervention by restoration professionals can help prevent further deterioration of the property. They have the necessary tools and techniques to address issues such as structural damage, soot damage, and corrosion caused by fire suppression methods.
  3. Specialized cleaning and restoration: Fire damage restoration experts possess the knowledge and equipment to effectively clean and restore the affected areas. They employ techniques like air filtration, soot and smoke removal, odor removal, and structural repairs to bring your home back to its pre-fire condition.

By engaging qualified fire damage restoration professionals, you can ensure that your home receives the comprehensive care it needs. They possess the skills, experience, and resources to restore your property efficiently, giving you peace of mind during the recovery process.

Need Help Restoring your Property after a Grease Fire?

Understanding how to safely extinguish a grease fire is an essential skill for every homeowner. By recognizing the causes of grease fires, adopting preventive measures, and knowing how to respond effectively, you can protect your loved ones and minimize property damage. By being prepared and knowledgeable, you can confidently handle grease fire emergencies and ensure the well-being of your home and family.

Jenkins Restorations takes specific steps to reduce the property destruction and to restore the property back to its original value. Contact our fire damage restoration experts to restore your property to its’ original condition…or better!

Frequently Asked Questions

Yes, you can use a class K fire extinguisher specifically designed for extinguishing a grease fire.

Never use water on a grease fire and avoid using flour or sugar as well. These substances are highly flammable and can exacerbate the fire, making it more dangerous.

No, flour should not be used to put out a grease fire. While it may seem intuitive to reach for flour as a means to extinguish the flames, it is highly flammable and can actually intensify the fire.

Water and grease do not mix, and the addition of water to a grease fire can cause the hot grease to splatter and spread rapidly. This can result in the fire becoming more intense and difficult to control. The water can also cause the grease to evaporate rapidly, generating steam that can carry burning grease particles and potentially lead to explosive reactions.

Understanding Classification of Fires

Fires are one of the most dangerous hazards that can happen in any place, at any time. While many people might think of fire as a single entity, there are different classes of fires, each with their own unique characteristics and requirements for putting them out. Using the wrong type of fire extinguisher on a fire could do more harm than good. In this article, we will explore the main classifications of fires and provide a comprehensive overview of each type.

What are the Different Types of Fires?

Fires are classified based on the type of fuel that is burning, as well as the conditions under which the fire is burning. The five main classifications of fires are Class A, Class B, Class C, Class D, and Class K fires. Each of these classifications requires a different approach for extinguishing the fire, as well as a different type of fire extinguisher.

What is a Class A Fire?

A Class A fire is a fire that is fueled by ordinary combustibles such as wood, paper, cloth, or plastics. These types of fires are the most common and can be found in homes, offices, and other buildings.

Class A fires are characterized by a steady flame and the presence of ash and smoke. The flames can range from small and contained to large and spread rapidly.

These can be caused by a variety of factors, including faulty wiring, smoking materials, cooking accidents, and heating equipment. Class A fires can also be caused by natural disasters such as lightning strikes and wildfires.

How to Extinguish a Class A Fire

When extinguishing a class A fire, you’ll want to do it with water or a water-based extinguisher. For this type of fire, water possesses the ability to cool and extinguish flames, but if applied to other forms of fire, it may worsen the situation by spreading the flames or delivering an electric shock. Additionally, it is important to make sure that all the flames are completely extinguished to prevent the fire from reigniting.

What is a Class B Fire?

A Class B fire is a type of fire that is fueled by flammable liquids or gases, such as gasoline, oil, or propane. These types of fires are often found in industrial settings and can be extremely dangerous.

classes of fires

Class B fires are characterized by a fast-spreading flame and the potential for explosions. These fires can be difficult to extinguish, as the fuel source can continue to reignite the flames even after they have been put out.

Class B fires are often caused by improper storage of flammable materials, flammable liquids or gases, as well as malfunctioning equipment such as boilers, BBQ grill, or furnaces.

How to Extinguish a Class B Fire

When dealing with class B fires, it is crucial to avoid using water as the fuel involved may cause the flames to spread, resulting in more harm than good. Instead, the best approach is to decrease the oxygen supply and suffocate the flames. Foam is a popular choice in this situation.

For stovetop fires in the kitchen, sodium bicarbonate (baking soda) or potassium carbonate are effective in suffocating the flames. It Is recommended to keep a fire extinguisher in the kitchen that is classified for this class of fires.

What is a Class C Fire?

A Class C fire is a fire that is fueled by electrical equipment such as appliances, wiring, and circuit breakers. These types of fires are common in industrial and commercial settings where electrical equipment is used.

Class C fires are characterized by a burning smell, sparks or arcing, and the presence of flames near electrical equipment. They can also produce toxic smoke and gases.

Type C fires can be caused by faulty wiring, overloaded circuits, and malfunctioning electrical equipment. They can also be caused by human error, such as using electrical equipment improperly or failing to maintain it properly.

How to Extinguish a Class C Fire

Class C fires require a specialized extinguisher called a Class C extinguisher. These extinguishers use non-conductive extinguishing agents that are safe to use on electrical equipment. Water should never be used on Class C fires, as it can conduct electricity and create a dangerous situation such as electric shock.

What is a Class D Fire?

Class D fires are commonly found in chemical laboratories. This type of fire is fueled by flammable metals such as magnesium, titanium, and potassium. These class of fires are common in industrial settings where these metals are used.

Class D fires are characterized by a bright, intense flame and the release of toxic gases. They can also produce explosive reactions when exposed to water.

Common causes of this type of fire include mishandling or improper storage of flammable metals. They can also be caused by industrial accidents such as spills or explosions.

How to Extinguish a Class D Fire

This special type of fire requires a specialized extinguisher called a Class D extinguisher. These extinguishers use dry powders or sand to smother the fire and prevent it from spreading. Water should never be used on Class D fires, as it can react explosively with the metal and create a dangerous situation.

What is a Class K Fire?

Class K fires can be sparked by the ignition of cooking liquid such as grease, oil, animal fat or vegetable fat. Distinct from other forms of liquid fire, these blazes are exclusively generated in a kitchen setting and typically found in restaurants and food service businesses. However, any kitchen may become vulnerable to class k fires – so take proper precautions!

These fires are characterized by the presence of burning liquid, which can spread quickly and dangerously. As a result, these fires require immediate action to contain and extinguish.

Class k fires are commonly caused by cooking liquid ignitions – when the temperature of a high-volatility fat, oil or grease source is raised too quickly or exposed to an open flame. Unattended cooking is particularly dangerous in this respect, as these fires can quickly become out of control.

How to Extinguish a Class K Fire

Saponification, the process in which triglycerides are combined with a strong base to form fatty acid metal salts during the soap-making process, is by far the most efficient and reliable method of combating class K fires. Fire extinguishers that are designed for class k contain a wet chemical agent which, when dispensed on the cooking oil or fat serving as fuel, converts it into soap – thus putting out the blaze.

Frequently Asked Questions

Fires can be classified in several ways depending on different factors. Here are the most common classifications:

  1. Classification by cause: Fires can be classified based on their cause, such as electrical fires, cooking fires, wildfires, arson fires, etc.
  2. Classification by fuel: Fires can also be classified based on the fuel source that is burning. For example, fires fueled by wood, paper, and other combustible materials are classified as Class A fires, while fires fueled by flammable liquids like gasoline or oil are classified as Class B fires.
  3. Classification by severity: Fires can be classified by their severity, ranging from minor fires that can be put out with a fire extinguisher to major fires that require the assistance of a professional fire department.
  4. Classification by location: Fires can also be classified based on where they occur, such as residential fires, commercial fires, industrial fires, or wildfires.
  • Class A Fires
  • Class B Fires
  • Class C Fires
  • Class D Fires
  • Class K Fires

Getting Help After Fire Damage?

Understanding the different classes of fires is crucial for effectively extinguishing them and preventing potentially dangerous situations. The five main classifications of fires are Class A, Class B, Class C, Class D, and Class K fires. Each type of fire requires a specific approach for extinguishing it and a different type of fire extinguisher. By knowing the characteristics and causes of each type of fire, individuals can take appropriate measures to prevent them and respond quickly in case of an emergency.

If you’ve recently dealt with fire damage, contact Jenkins Restorations. We are available 24/7 on our emergency line – 888.450.6580 to help get your home back to normal. With decades of experience in fire and smoke damage restoration, we will quickly restore your property to its’ original condition…or better!

Soot Tags and Soot Webs: What You Need to Know

If you have seen the aftereffects of a fire in a residential home, even a small kitchen fire, you’ve seen soot tags. Soot tags may not be the biggest worry for, but you need to take care of them before they ruin your favorite pair of shoes or that gorgeous cocktail dress you’ve been saving to wear for a special occasion. To help you understand soot tags and how to clean up your soot related mess, here’s a quick overview:

What Are Soot Tags?

Any time there is a fire, there’s a chance of soot webs, also known as soot tags. Soot tags look like spider webs in the corners of rooms, which is why they are sometimes called smoke webs. No matter what you call them, these smoky webs are wreck havoc, and can cause breathing problems for you and your family.

During a fire, the flames release chemicals into the air that come from items burning in your home. While the majority of fires in homes begin in the kitchen, chemicals from burning wood, plastics, carpets, walls and even clothing can swirl around everywhere.

You’ll notice soot tags in corners, along the walls, and even on furniture or clothing. If you leave soot tags alone, they will eventually stain and impair the restoration of your home or business as well as your contents after a fire. If water was used to douse the fire, the chances are more likely you may be faced with soot webs and mold at the same time.

How Do I Clean Up Soot Tags?

Cleaning soot tags  is a step-by-step process. First, use a shop-vac to remove as much of the soot webs as possible. Get as close to the soot as possible with the nozzle without pressing against the walls or other items and let the vacuum do the work.

If the soot tags are extensive or difficult to remove, it may be best to seek professional help from a cleaning or restoration company.

Remember, soot tags can be harmful to your health and difficult to cleanup. Without proper equipment or expertise, they can threaten your health if you inhale the residue when trying to remove the soot webs. You don’t want to accidently ingest soot particles through your eyes or skin when they float around. It’s important to take the necessary precautions and use the right tools and techniques to get the job done safely and effectively.

Common Places Soot Tags Reside

While soot tags are often found in corners of your home and along walls as mentioned before, they can also reside in other areas of your home as well. Soot tags may be present anywhere where air doesn’t circulate well, such as closets.

Your closet may have several issues after a fire. First, just as with the other rooms in your house, make sure you have removed the soot tags with a vacuum.

If the shoes in your closet are moldy after the fire, you will need to try a different technique. If there are soot tags on your moldy shoes, remove them first with a vacuum. Next, gently clean the inside and the outside of your shoes with a mixture of water and rubbing alcohol. You will want to make sure you cover every inch of your shoe in order to remove all of the mold. Allow the shoes to air dry.

After all of the cleaning, you may still notice residue from soot on your walls—not only in your closet, but throughout the house. You can remove residue with those “magic” sponges made from melamine. They do a great job getting rid of lingering soot residue.

When Might I Need Help Cleaning Up?

If you were the victim of a large house fire, you will need to call in professional help. Professionals like Jenkins Restorations have the equipment to clean and remove all of the residue, soot and chemicals left behind after a house fire.

If you are feeling overwhelmed with the prospect of cleaning up after a house fire, it’s understandable. You don’t have to face the cleanup after a fire alone. We can help you repair and restore your home to its original glory. Contact Jenkins Restorations today, and let us help you move forward!

8 Useful Candle Safety Tips

Candle safety is a topic that comes up frequently at home. From candles being left burning unattended to candle wax dripping onto furniture and carpets, there are many ways that candles can cause damage. Candle fires cause an estimated 15,600 house fires, 150 deaths, and 1,270 injuries each year, resulting in 3% of all fire related incidents.

How to Burn a Candle Safely

1) Check Candle Warning Stickers

candle fire

The first thing you need to know about how to burn a candle safely is that candles are not always safe! Candles come with different warnings on them for a reason. These types of warning should be taken seriously as they could lead to a candle house fire if ignored.

2) Never Leave Candles Unattended

Never leave lit candles unattended. Even when you think you will be right back, accidents happen. It’s best to always extinguish any candle before leaving the room and keep them out of the reach of children and pets. For additional safety, candles could also be placed in holders so they don’t fall over.

3) Keep Lit Candles Away from Flammables

Never place a lit candle next to any flammable material like curtains, rugs, fabrics, or combustible liquids.

4) Use the Proper Wick

Always use the proper type of wick for each particular style of candle. The wicks used in votives or pillar candles will be much longer than those found on taper candles.

5) Trim the Wick

Another important tip for how to burn a candle properly is to keep the wick trimmed correctly. When lighting a new candle, trim off all but 1/4 inch of the wick before placing it in its holder. This ensures that the flame doesn’t go too far down the wick which would result in a shorter life span for the candle. It also helps prevent the candle from catching fire due to over-extending itself. Once the candle burns through completely, remove the remaining portion of the wick.

6) Keep the Flame Steady

When using a lighter, make sure that you’re keeping the flame steady. Don’t blow air directly towards the flame or allow the flame to waver back and forth. Doing so can cause the candle’s fire to spread.

7) Make Sure to Extinguish the Flame!

When burning a candle, remember that it takes time for the candle to become fully extinguished. Therefore, do not expect a candle to extinguish instantly after removing it from its container. Allow the candle to cool slightly before moving it. Never put a wet candle near anything that might catch fire. And finally, once the candle has burned completely, dispose of it responsibly. It is recommended that you throw a used candle away in a sealed metal canister rather than just putting it in the trash.

8) Storing your Candles

Store candles properly. Make sure that you store them where children cannot reach them and avoid storing candles anywhere near flammable materials like curtains or rugs.

How Do Candles Start Fires?

Candle fires start when a candle burns too close to flammable objects such as curtains, wood furniture, or clothing. The heat from the flame melts the wick, which then drips wax onto the surface below. When the wax touches the object, the temperature rises and the wax ignites. This pool of wax is then exposed to oxygen, causing the flame to grow.

Can a Candle in a Glass Jar Start a Fire?

Using a glass jar as a candle container is considered best practice to prevent a fire. The glass keeps the open flame from touching anything flammable and risking catching anything in your home on fire. Even then, make absolutely sure that the candle is no closer than a foot to anything that could possibly catch fire.

What Happens if you Leave a Candle Burning Overnight?

Candles can become unstable if they’re left to burn for too long. If you leave a candle burning overnight, you may have an unexpected visit from firefighters who are called to put out the flames. After a candle burns for around four hours, carbon build-up begins, creating an unstable flame. This can lead to wax tunneling, soot damage, and damaging the candle container.

Beyond that, leaving a candle burning overnight raises the risk of other incidents, such as the candle being knocked over. This may sound unlikely, but a strong wind, a huge insect, or even a pet, can knock the candle over and potentially cause a house fire.

Another potential incident of leaving a candle burning overnight is a candle flashover. A candle flashover is when all the wax in the candle melts and catches fame of the wick and is ignited. If this happens, it can set fire to anything close to the candle.

How to Put out a Candle Correctly

Using a candle snuffer is the best way to put out a candle, for safety reasons. It does not allow any ash or wax residue to be left behind. For indoor use, it avoids creating smoke that may set off an alarm system and/or cause damage by burning nearby objects.

A candle snuffer is simply a metal cone with wire screen around it’s opening that covers only the flame; when the flame touches the wire screen inside of the cone it extinguishes because there is no oxygen getting through. The wire screens are even designed so they don’t interrupt the fragrant smell of your candle! Since these cones collapse down small you can take them anywhere.

Never use water to put out a candle! The water will cause the hot wax to spatter, sometimes causing burns.

Out of all fire-related deaths, candles are responsible for nearly half (45%). Many fires that result in death begin very close to where people sleep and most often during nighttime hours when someone is sleeping. These statistics should be enough motivation to ensure your home has adequate candle safety.

Do Candles go Out on their Own?

It is a common thought that you can let a candle burn itself out. However, only candles in jars or containers with a wick that come from a metal bottom are able to self-extinguish. If you attempt to let any other kind of candle burn themselves out, it becomes a safety concern.

Other Ways to Put out Candles

There are a few other ways to put out candles: using a wick dipper or your fingers.

Wick Dipper

For many people, the most familiar and common way to deal with an unsightly stub of wax is by using a wick dipper – an inexpensive metal tool made for this purpose – with the blade positioned horizontally and pointing towards the candle’s base (this helps prevent flaming). Dip the end of the wick dipper into the flame (typically one-third down from its top), then retrieve it again; as it moves back up through the now-cooler waxes, they “melt” away from one another making for easy separation.

How to Put out a Candle with your Fingers

The other option is less graceful but at least as effective: simply lick your fingers and pinch off the tip of the wick with your fingers and discard!

Is Candle Wax Flammable?

Wax that is used in candles can catch fire, but not easily. Compare it to other things that are flammable, wax is pretty resistant to catching fire. It usually takes a lot of intense heat to make the wax combust.

How to Put Out a Wax Fire

If there is a wax fire in your home, use a dry chemical or baking soda to smother the flames. Remember: never use water on a wax fire, as this can cause it to expand violently and throw hot coals into the air which could start another fire elsewhere!

Frequently Asked Questions

No, you should not leave a candle burning overnight. This is a dangerous fire hazard and can lead to a serious house fire.

Yes, you can put out a candle with a lid. However, you should be careful when doing this because the wax may drip down onto the floor

As a general rule of thumb, candles shouldn’t be left burning for longer than four hours. After you put out a candle, let the candle cool for at least two hours before relighting it.

Unattended candles start many preventable fires. A candle left unattended can burn down a home and cause major damages. You can avoid this problem by placing candles away from flammable materials, and not leaving them burning unsupervised.

How to Remove Soot: What is Soot?

Soot is made up of tiny particles of carbon due to incomplete combustion of fossil fuels (such as wood, oil, coal, etc.). Soot contains acids, chemicals, metals, and dust that leaves an ugly black residue and an unpleasant smell. It is important to know how to remove soot, to prevent further damage to items within your home.

During a fire, soot spreads to the whole house, attaching itself to surfaces. Fire soot damage can further affect the property as well as the indoor air quality if the soot is not removed immediately.

Soot can also linger in the home even if a fire never occurred. For example, excessive use of candles can lead to soot buildup over time. It’s probably a good idea for property owners to use them sparingly (as they are also a fire risk). Fireplaces can release soot too if they’re not properly ventilated. Furnaces are also a source of soot contamination when they produce a puff back.

To help you find answers to your specific questions, we’ve put together an interactive table of contents. Click each link to be transported to different sections.

How to Clean Soot

The most common way to remove fire soot damage is to clean soot stains thoroughly with a gentle solution.  To remove stains from walls, furniture, and floors, use a mild soap or detergent. Another easy solution is to mix 4 to 6 tablespoons of tri-sodium phosphate with 1 cup of a household cleaner or chlorine bleach to every gallon of warm water. Wear rubber gloves while cleaning and carefully rinse surfaces with clear warm water then dry.

However, there may be many different surfaces affected by soot that require special cleaning methods. Below is a list of common areas of your home that can be vulnerable to fire and soot damage and tips on how to carefully remove soot stains in those specific areas.

How to Remove Soot from Brick

soot on brick

For anyone who has ever had a house fire, you know how devastating the soot and smoke damage can be. Fortunately, there are some ways to clean soot off brick so that it will not cause further damage. The following guide is going to show you how to get rid of the soot on your bricks without damaging them any more than they already are.

Start by using water and white vinegar which should loosen up the soot residue left behind from the fire. Next, we’ll take an old toothbrush dipped in baking soda and scrub the bricks along all of those tough spots that just refuse to come clean with anything else. Lastly, use a bucket filled with warm water mixed with a small amount of bleach (for sanitizing purposes) and then rinse everything off gently.

Try this method to remove any soot from the brick and repeat if necessary.

How to Clean Soot off Walls

Removing soot from walls is a dirty job, but it’s one you’ll have to do if your house has been damaged by fire. Use these tips and tricks for how to clean soot and smoke odors off walls after a fire:

How to Get Soot Out of Clothes

Soot stains are hard enough to get out on their own without having to worry about blending them with other stains as well. Thankfully, there are ways you can clean your clothes and save yourself some time, money, and frustration!

The best way to start is by soaking the soot-stained garment in cold water for at least 15 minutes before washing it normally. This will help remove any hardened or burnt-on layers of soot that may have accumulated over time due to repeated washings (especially if you don’t use a dryer).

Another way to get soot out of clothes is to carefully use chemicals to clean your clothes by following the steps below:

How To Remove Soot from Carpet

A soot stain on your carpet can be a tricky thing, but with the right products and some know-how it isn’t that hard to get rid of. These short steps will have your carpet free of soot:

How to Remove Soot

How to Remove Soot from Metal

It is a common problem for those who have experienced house fires and are left with black stains on their metals. This post may also be helpful if you live in an area where it gets really hot or has been experiencing wildfires that leave behind these unsightly stains.

To get started removing soot from metal, take your metal object outside, and use the hose to spray it down until all of the soot residue comes off. If there are still stubborn marks left over, try using some Brillo pads or Bar Keepers Friend which can scrub off any remaining marks from your metal items. When finished, rinse with water again and dry completely before bringing back inside (to prevent rusting).

How to Clean Soot off Painted Metal

The best way to clean soot off painted metal is to first mix several drops of dishwashing liquid with hot water. Next, dip a scrubbing sponge into the water and move it over the soot deposits to break off the soot from the metallic surface.

After that is completed, mix together white vinegar and warm water in a spray bottle, and spray it on the fire soot to knock out any remaining soot deposits. The acidic ingredient will help break it up and clean the painted metal. Then, run a nylon scrub brush against any soot still remaining to get rid of it. Lastly, use a damp rag to remove any soap or vinegar that remains and then dry the painted metal with a rag.

How to Remove Soot from Aluminum

The best way to remove soot from aluminum is to first sweep and loose soot off your siding with a dry boom. After that, wipe the area down using a dry cleaning soot sponge. Finally, follow that with an application of commercial soot remover and rinse.

How to Remove Soot from Stainless Steel

To eliminated heat discoloration on stainless steel, dip a soft cloth in vinegar and scrub the surface of the stainless steel. As you do this, the heating tapes will begin to transfer to the fabric. Scrub the surface until there are no more streaks to be seen.

How to Clean Soot from Wood

A fire in your home can be one of the most devastating experiences you will ever endure. The soot that is left behind from fire damage can irritate and damage your lungs, but there are ways to remove it from wood without having to replace a lot of things in your house.

Try using an oven cleaner or Windex with Ammonia mixed with water. Apply the mixture liberally to all surfaces before wiping clean with a damp cloth. This method should remove any lingering soot and leave your floors looking brand new!

Note: avoid using vinegar, as this can leave stains and damage your wood surfaces.

How to Remove Soot from Concrete

One of the most common ways to clean up a sooty mess is with an acid or alkaline cleaner. This type of cleaner can be found at any hardware store and should be applied liberally to the affected area. After you have scrubbed the surface, rinse it off with water and allow it to dry.

If there are still stains visible after drying, repeat this process until all traces of soot are gone. You may need to use a pressure washer if your concrete has been stained from oil or other chemicals that could not be removed by cleaning alone. In addition, make sure you wear gloves while applying any type of chemical because most cleaners will irritate skin if they come in contact with it for too long.

How to Remove Soot from Carpet

The idea of having to clean up soot from your carpet can be daunting. But, removing it doesn’t have to be difficult! The first thing you should do is vacuum the soot out of the rug with a low setting and then use a wet/dry vacuum to suck it right back up. You may also want to add something like baking soda or cornstarch into this mixture in order to help absorb some of the grease and oil that can leave stains on your flooring.

If these methods don’t work for you, try using dry cleaning products such as benzyl acetate (found in hairspray) or xylene (a solvent). Apply one at a time and see which one works better for you!

How to Remove Soot Stains from Stone Fireplace

A soot stained fireplace can ruin a focal point in a room and take away from the beauty of the stone. To clean up the soot, start by vacuuming the area using a small nozzle. You can also brush the area to remove the fire soot. Then, use a product such as Soot Eraser to wipe on the stone.

How to Remove Soot from Engine Oil

Excess soot levels in the oil can quickly overwhelm dispersant additives and form what is commonly known as sludge. If you want to remove soot from your engine oil, you should use a filter that has been designed for this purpose. The best way to do this is to use a paper filter, which is inexpensive and easy to replace.

How to get Soot out of Curtains

You can use essentially the same process to remove soot from fabrics like curtains and bedding. First, shake them out and then clean them with baking soda and a strain remover. Rinse the fabric and then give it another soak in baking soda and vinegar to pull out the soot.

Fire Soot Removal Services

If you’ve suffered from fire soot damage or stains, contact Jenkins Restorations. We have years of experience in the industry and our goal is to provide you with the best service possible. As a result, we want to create a safe environment for your home where it can be rebuilt back into its original state without any worries about safety hazards that could be present before restoration services are completed.

Contact us today and we’ll give you all the information needed on why Jenkins Restorations should be your first call when disaster strikes!

Frequently Asked Questions

There is no “safe” level of soot exposure, as even small amounts can be harmful to your health. Inhaling soot can cause a number of respiratory problems, including bronchitis, breathing issues, and asthma. Soot effects infants and elderly who already have breathing problems the most, and can enter your body through inhalation, ingestion, through your skin, and eyes.

Yes, it can be dangerous to breathe in soot. Soot is made up of a number of harmful chemicals and particulates that can damage your lungs and respiratory system.

Toaster Fires and How to Prevent Them

The delicious smell of an English muffin, cinnamon raisin toast, or a scrumptious bagel are sure signs your making good use of your toaster. However, if you notice smoke or weird smells coming from your toaster, this may be a sign of an impending toaster fire.

So are toasters safe? Your toaster is one of the more dangerous appliances in your kitchen and can be a serious house fire hazard if not taken care of correctly. It is estimated that over 700 people around the world are killed each year as a result of toaster fires and electrocutions. 

Fires from your toaster are often caused by mismanagement of the appliance. Here we will talk about what you need to do if your toaster catches on fire, as well as some other tips for preventing it from happening in the first place!

Are Toasters a Fire Hazard?

toasters fire hazard

Toasters are inherently dangerous because they produce heat. The problem is that electric elements can continue to generate the necessary amount of heat even after their selected time has elapsed, and this could potentially lead to fires.

Toasters are also placed next to other appliances which can lead to a fire as well, especially because some toasters have been found to stay turned on even when the toaster lifter is in the off position. Being close to other appliances causes the fire to have the ability to expand quickly around your kitchen.

Prevention

To avoid the danger of your toaster there are important steps you can take that will lower the chances of it catching on fire. Below, we tell our favorite tips for keeping your kitchen safe from toaster fires:

How Often Should You Clean Your Toaster?

The best way to prevent a toaster fire is to use proper maintenance techniques. Cleaning your toaster every week helps ensure that it lasts longer than its expected life span. You don’t want to risk having a faulty appliance that might burn down your house.

Why is my Toaster Smoking?

If your toaster begins smoking, it doesn’t always mean a full out fire is about to start. Reasons for smoke could be from dust, cobwebs, oil, grease or maybe it’s a new toaster and the factory coating could be smoking.

Don’t be alarmed if your toaster is smoking. In most cases, the greatest approach to get rid of all that smoke from a device is to allow it burn off, whether it’s factory coating, dust or grease.

What do You do When a Toaster Catches on Fire? 4 Steps

When prevention methods aren’t enough, you may find yourself facing the onset of a toaster fire. So, now what do you do when you have a toaster on fire?

  1. First, unplug your toaster immediately. You must make sure to cut off the power before putting out any flames as this will help prevent them from spreading onto other surfaces or rekindling themselves.
  2. Next, use a fire extinguisher or fire blanket to cover the fire and prevent oxygen from helping it grow. If you have a fire extinguisher, hold the nozzle close to the base of the flames and spray until extinguished; if using a blanket, cover up any remaining flames with it. It is always best to smother the flames. Never fan them, as this will only cause the flames to grow.
  3. Turn off any electric appliances nearby to prevent them from getting overheated or sparking another fire while you put out the original one.
  4. Once the fire has been extinguished, open a window for ventilation and remove all items from the surrounding area to avoid hot spots that can reignite in other areas of your kitchen.

Remember – If the fire begins to spread, stay calm, exit the house, and call the fire department immediately.

Why Do Toaster Ovens Catch on Fire?

If crumbs and food particles accumulate at the base of the toaster, oven where the heating element is located, they could ignite and catch fire. Food being left in the toaster oven for too long a period or at too high of a temperature can also lead to it catching fire. Due to their proximity to flammable materials, these pose an obvious threat for fire.

Preventing a Toaster Oven Fire

It’s important that the inside of your appliance stays neat and tidy, so as not to promote bacterial growth. To maintain this balance in order for food items stay safe, keep an eye on crumbs getting into the bottom or even drippings onto metal surfaces like grills or racks. If there are any hard-to-reach areas (especially at higher levels), take advantage of removable parts such as trays and racking systems which make cleanup easy breezy!

Experiencing a Toaster Oven Fire?

Toaster ovens are different from toasters, however if yours catches fire, follow the same guidelines as a toaster fire. Turn off any appliances that may have sparked and smother it with fire extinguisher or fire blanket.

How to Clean a Toaster After a Fire

To clean and repair your toaster, turn it off completely. Gently remove any crumbs or debris from the bottom of the appliance while it’s still cool. Use a vacuum cleaner attachment to suck out anything you can’t get with your hands (or else use an old toothbrush). Wipe down all removable parts using vinegar and water solution.

When a fire takes place in your kitchen, it can be scary and stressful. Once the fire is out, you may wonder what to do next. That’s where we come in. The Jenkins Restorations team is available 24/7 with an arsenal of powerful tools and processes that will restore your home back to normal as soon as possible.

Frequently Asked Questions

Toasters heat up to about 500 degrees Fahrenheit. The temperature of the toaster depends on the amount of electricity used. If you use a lot of power, then the toaster will be hotter.

Yes, you can use a toaster on it’s side. The only problem is that you may burn yourself when you put the bread in the toaster.

Toaster ovens are generally safe to use in any home setting, as long as they are used properly. When operated according to the manufacturer’s instructions and with a few basic safety precautions, there is no reason to fear using this convenient kitchen appliance.

Yes, a toaster uses electricity when not in use. However, it is important to note that a toaster is not a power hog. A toaster only uses about 1 watt of energy while it is heating up bread.

A toaster take in electrical energy from the power outlet that it is connected to. The toaster then, converts that energy into heat.

Toaster ovens do not use radiation in the way that nuclear radiation or X-rays do. However, they do utilize a form of heat transfer known as radiant heat, which is often confused with radiation.

Yes, leaving the oven on can cause a fire. In fact, leaving a gas oven on can cause a fire and carbon monoxide poisoning. It is unsafe to leave an oven on when you are not around.

Regardless of how hot a toaster might get, it does not kill mold. Consuming mold can make you very sick, and  toasting moldy food such as bread and eating it, is still dangerous.

If you put metal in a microwave, it could not only melt the metal, but it can act as a conductor to electrocute you within a minute. This can cause serious danger and possibly result in fatal shock.